Hide the Robot Vacuum: Make Cleaning Tech Invisible in Your Living Room (Without Sacrificing Access)
Hook: You want a spotless living room without the vacuum becoming the room’s focal point. Between pet hair, guests, and tight layouts, robot vacuums can feel like another piece of clutter rather than an invisible helper. In 2026, as self-emptying, wet-dry, and multi-floor robot vacs become household standards, smart living room design means making these devices accessible to dock and maintain — while keeping them visually unobtrusive.
Quick overview — what you’ll get from this article
Right up front: practical solutions you can use this weekend (including renter-friendly hacks), furniture modifications for seamless docking, measurable specs and clearances for most models, pet-owner-specific advice, ventilation and electrical safety, and 2026 trends that will shape the next generation of home tech integration.
Why hiding the robot vacuum matters in 2026
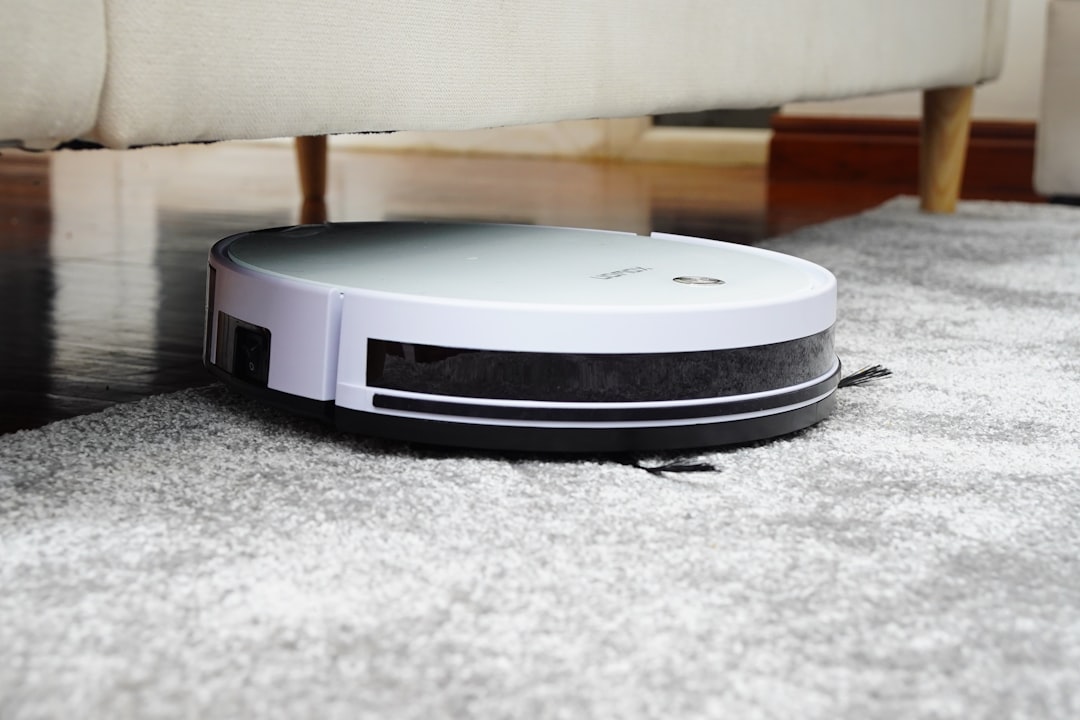
Robot vacuums are no longer gimmicks. By late 2025 and into 2026, the market accelerated toward large, multi-function units (self-empty, wet-dry, climb-capable models like the Dreame X50 and Roborock F25 families). That means bigger docks and more visible accessories. Instead of fighting the tech, modern living room design accepts it: make docking effortless and discreet so your decor stays calm, and the vacuum stays effective.
"Designing for tech is design for everyday life — the goal is effortless function that disappears into the background."
Core principles — make vacuums accessible, not prominent
- Clear path to dock: The robot must find and reach its charging station reliably.
- Maintainability: The dock must be easy to pull out and service (empty dustbin, change filters).
- Ventilation & power: Self-empty docks need space and airflow and safe electrical access.
- Visual concealment: Use furniture, trim, or textiles to hide gear without blocking sensors or antennas.
Measure first: the three numbers you always need
Before you modify furniture or build a dock, measure your robot and its dock. Most modern robot vacuums fall into these ranges — but always confirm with your model:
- Robot height: 3.0"–3.8" (common) — measure from the floor to the top of the bumper.
- Dock depth (front-to-back): 5"–12" depending on self-empty bin size.
- Dock clearance/approach: allow 4"–8" of unobstructed floor in front of the dock for reliable alignment.
Actionable step: tape off the footprint of the dock on the floor and place the robot on its charging pins to make sure approach vectors work before cutting or hardwiring anything.
Furniture hacks that enable seamless docking
These modifications suit a range of skills — from DIY weekend projects to pro carcase carpentry. I’ve tested and adapted each approach in real living rooms and recommend the ones below for durability and aesthetics.
1) Recessed toe-kick docking (best for credenzas, media cabinets)
How it works: create a recessed cavity in the base of a console or TV cabinet so the robot docks inside a hidden bay. The cabinet hides the dock when the robot is parked but leaves the opening for approach and IR signals.
- Cut a 4"–6" high by dock-width opening in the front toe-kick. Use a removable panel if you want a seamless face when closed.
- Install a shallow shelf for the dock; anchor a cable management channel back to a concealed outlet or power strip inside the cabinet.
- Leave a 1–2" gap above the dock lip for ventilation — essential for self-emptying bases that expel dust.
- Pro tip: line the cavity with matching veneer or paint the interior a dark tone so the dock visually disappears.
2) Cutout in open shelving or a low console
Easy and renter-friendly: measure the dock footprint and remove one shelf plank, or create a custom cutout. Use acrylic or perforated metal behind the opening if you want to obscure the dock but keep sensors and Wi‑Fi signal intact.
3) Floating bench with hidden bay
For entryways and living rooms with benches: build a bench with a floating top and a recessed cavity beneath for the dock. The robot can dock unobtrusively and the bench doubles as seating and a pet zone.
4) Behind a fabric skirt or curtain
For renters, a heavy drape or tailored fabric skirt attached to the underside of a console hides the dock while leaving the opening. Velcro strips make it removable — and washable for pet households.
5) Sliding front panel with magnetic access
Install a sliding or hinged panel that automatically opens for docking (use a small ramp) and closes afterward. Pair with light-touch magnetic catches to avoid noisy slams.
DIY docking builds — step-by-step mini project (weekend)
Goal:
Create a recessed dock inside a low TV console without cutting structural joists.
- Measure: robot height, dock depth, and docking approach width.
- Mark: tape the dock footprint on the floor and the front opening on the console base.
- Remove the baseboard or toe kick panel on the console (often removable).
- Cut a rigid backing board inside the cabinet to create a platform for the dock; allow 0.5" front lip overhang for alignment.
- Route a cable channel from the dock platform to an internal power strip. Use a GFCI-protected outlet if near water (pet bowls), or hire an electrician for hardwiring.
- Test: place the dock, run the robot through a charging cycle, ensure alignment and sensor visibility.
- Finish: paint or veneer the cavity, add a removable grill or fabric panel if desired, and attach cord clips to keep the cable flush with the platform.
Renter-friendly solutions (no permanent changes)
- Decorative basket or tray: Use a low-profile basket that the robot can enter. Cut a small front notch for approach. Use non-slip pads and ensure the dock itself sits firmly.
- Skirted console: Attach fabric with removable strips or tension wire under furniture.
- Low-profile furniture items: Replace an open shelf with a purpose-built floor tray — no cutting required.
Tech & sensor considerations
Robots use IR, physical bumpers, LiDAR, and sometimes magnetic strips for navigation. When hiding docks, avoid materials that block IR or radio signals (thick metal grilles or fully enclosed metal boxes can interfere).
- Keep the dock's front opening unobstructed and at floor level.
- Avoid dense foam or metal directly in front of charging contacts.
- Test connectivity to Wi‑Fi and app-based mapping after installation; some models need initial line-of-sight for mapping calibration.
Power & ventilation — safety first
Self-empty docks and wet-dry systems generate heat and need airflow. If you plan built-in docks:
- Leave 1–2" clearance at the rear and top of the dock for heat dissipation.
- Install a grounded outlet inside the cabinet; if you hardwire, use a qualified electrician.
- For wet-dry units, ensure damp zones are isolated from electrical components and provide removable trays to catch drips.
Solutions for pet owners
Pets change the equation. Homes with shedding animals need robust suction, larger dustbins, and a docking solution you can service quickly.
- Self-empty docking stations: They reduce daily trips to the bin. But they’re bulkier — hide using deeper cabinets or recessed toe-kicks.
- Dedicated hair-mat in front of dock: A low-pile rubber mat collects excess hair and prevents clogging during approach.
- Schedule frequent runs: Use zoned cleaning and run cycles during times pets are occupied elsewhere to reduce stress.
- Allergen-friendly finishes: Choose wipeable surfaces around the dock (laminate, sealed wood) for quick cleanups.
Case studies: Real-world examples and outcomes
Case 1: Urban apartment — renter, one dog
Problem: A two-bedroom apartment with limited floor space and a shedding medium-sized dog. Solution: The owner installed a removable fabric skirt under an existing media console and used a tray for the dock. Outcome: The vacuum docks reliably, the skirt is washable, and the dock is hidden during guests’ visits. Maintenance is a 2-minute weekly task.
Case 2: Suburban living room — family with two cats
Problem: A Roborock F25 with a self-empty station dominated the TV wall. Solution: The family recessed the dock into a custom-built credenza with a sliding front panel and integrated a ventilation grill at the rear. Outcome: Docking is seamless and dust management improved; the credenza doubles as a pet feeding station on the opposite side.
Case 3: Open-plan home — tech-forward owners
Problem: A Dreame X50 Ultra (noted in late-2025 press for its climbing and multi-floor abilities) has a larger dock footprint and multiple routing needs. Solution: A built-in floating bench with an internal power channel and removable dust access panel. Outcome: The robot docks reliably on multiple floors (using removable ramps) and the bench hides the hardware; the household benefits from scheduled multi-floor cleanings without visual disruption.
2026 trends — what’s changing and what to plan for
- Thinner robots: Expect a wave of lower-profile robots and more rails-friendly designs in 2026, making under-furniture docking more common.
- Wireless charging docks: Early models appeared in trials in late 2025; by 2026, expect more magnetic/inductive docking options that require less precise pin alignment.
- Matter & Smart Home interoperability: Broader adoption (follow-up from late-2025 standardization efforts) means docks will integrate with home automation — docks can mute during movie time, or relocate smart plugs can power-cycle docks remotely.
- Modular furniture: Furniture lines now include built-in tech channels and removable panels for vacuums — choose pieces labeled "tech-ready".
Checklist before you start
- Measure robot height and dock footprint.
- Confirm required front clearance for approach and alignment.
- Test docking in the proposed location for at least three consecutive cycles.
- Plan for ventilation and easy access for bin emptying and filter changes.
- Consider power source placement — if unsure, consult an electrician for hardwired installations.
Common pitfalls and how to avoid them
- Pitfall: Fully enclosing the dock. Fix: Add a vented panel or leave a 1–2" gap for airflow.
- Pitfall: Hiding the dock behind metal mesh. Fix: Use fabric or perforated materials that preserve IR/RF transmission.
- Pitfall: Putting the dock on uneven flooring. Fix: Use shims or a flat platform to ensure correct docking alignment.
- Pitfall: Forgetting maintenance access. Fix: Install removable panels or sliding trays for quick emptying.
Budget guide — low, medium, and high-cost routes
- Low-cost (under $50): Fabric skirt, tray, or reposition dock to an existing low-profile shelf.
- Mid-cost ($150–$700): Custom shelving modification, removable panels, or new bench with recessed bay.
- High-cost ($700+): Built-in cabinetry with hardwired power and ventilation, electrician and carpenter labor, integrated sliding doors and ramps.
Final actionable takeaways
- Always measure first — robot height, dock depth, and front clearance are non-negotiable.
- For renters, use removable fabrics, trays, or short furniture swaps to hide docks without damaging property.
- If you own the property, consider a recessed toe-kick or built-in bench for the cleanest look and easiest long-term access.
- Pet homes benefit most from self-empty docks — plan for extra bin ventilation and service access.
- Plan ahead for 2026 trends: choose furniture with tech channels or that can accept modular inserts for future docks and wireless charging.
Where to go next — resources and inspiration
If you want an instant starting point: measure your model, tape off the proposed dock footprint, then test docking for three cycles. If it fails, try a different opening angle or a shallow ramp. For custom builds, download a one-page template with standard dock dimensions and a shopping list for materials from our design tools page.
Call to action
Ready to make your robot vacuum disappear into your living room design? Download our free "Robot Docking Design Checklist" with model-specific measurements, or book a 15-minute design consult to get a tailored plan — whether you rent, own, or live with pets. Keep your living room stylish and spotless, and let tech do the work without cluttering your space.
Related Reading
- Podcast Catering 101: Easy Menus for Live Recordings and Launch Events
- Procurement Strategies for Small Grocers During Grain Price Volatility
- Troubleshooting Viennese Fingers: How to Pipe Perfect Melt-in-the-Mouth Biscuits Every Time
- Refurbished Gear Roundup: Save on Travel Tech for Your Canyon Trip
- From VR meeting rooms to marketplace failures: lessons for immersive NFT experiences


